Read Profile
Write a Get Identity query
CyberConnect can help you create profile pages for users of your DApp. You can retrieve an address's domain name, following & followers list, and Twitter handles among other information using GraphQL queries. For more details and all fields retrievable from CyberConnect Identity API, please read Identity.
Create a new directory queries at packages\react-app\src and then create a new JavaScript file cyberconnect.js to handle all queries needed. Include the following code to implement a Get Identity query in cyberconnect.js:
packages\react-app\src\queries\cyberconnect.jsimport { GraphQLClient, gql } from "graphql-request";
// CyberConnect Protocol endpoint
const CYBERCONNECT_ENDPOINT = "https://api.cybertino.io/connect/";
// Initialize the GraphQL Client
const client = new GraphQLClient(CYBERCONNECT_ENDPOINT);
// You can add/remove fields in query
export const GET_IDENTITY = gql`
query ($address: String!, $first: Int) {
identity(address: $address) {
address
domain
avatar
followerCount
followingCount
twitter {
handle
}
followings(first: $first) {
list {
address
domain
}
}
followers(first: $first) {
list {
address
domain
}
}
}
}
`;
// Get Address Profile Identity
export async function getIdentity({ address }) {
if (!address) return;
const res = await client.request(GET_IDENTITY, {
address: address,
first: 5,
});
return res?.identity;
}Add the user profile to ExampleUI at packages\react-app\src\views\ExampleUI.jsx. In this example, we attempt to display the address’s Twitter handle, ENS domain, and followers/followings counts.
packages\react-app\src\views\ExampleUI.jsximport { Button, Card, DatePicker, Divider, Input, Progress, Slider, Spin, Switch, Row, Col } from "antd";
import React, { useEffect, useState } from "react";
import { utils } from "ethers";
import { SyncOutlined } from "@ant-design/icons";
import { Address, Balance, Events } from "../components";
import { getIdentity } from "../queries/cyberconnect";
export default function ExampleUI({
purpose,
address,
mainnetProvider,
localProvider,
yourLocalBalance,
price,
tx,
readContracts,
writeContracts,
}) {
const [newPurpose, setNewPurpose] = useState("loading...");
const [identity, setIdentity] = useState(null);
const fetchIdentity = async () => {
if (!address) return;
const res = await getIdentity({ address: address });
if (res) {
setIdentity(res);
}
};
useEffect(() => {
fetchIdentity();
}, [address]);
return (
<div>
{/*
⚙️ Here is an example UI that displays and sets the purpose in your smart contract:
*/}
<div style={{ border: "1px solid #cccccc", padding: 16, width: 500, margin: "auto", marginTop: 64 }}>
{/* CyberConnect Profile Section */}
<div>
<h2>CyberConnect Example UI:</h2>
<Divider />
<div style={{ textAlign: "left", marginLeft: "10px" }}>
<h3>Your profile (identity):</h3>
{identity && (
<div>
<Row>
<Col span={6}>Twitter handle:</Col>
<Col span={18}>{identity.twitter?.handle ? identity.twitter.handle : "n/a"}</Col>
</Row>
<Row>
<Col span={6}>Address:</Col>
<Col span={18}>{identity.address}</Col>
</Row>
<Row>
<Col span={6}>Domain:</Col>
<Col span={18}>{identity.domain ? identity.domain : "n/a"}</Col>
</Row>
<Row>
<Col span={6}>Followers:</Col>
<Col span={18}>{identity.followerCount}</Col>
</Row>
<Row>
<Col span={6}>Following:</Col>
<Col span={18}>{identity.followingCount}</Col>
</Row>
</div>
)}
</div>
</div>
<Divider />
<h2>Example UI:</h2>
<h4>purpose: {purpose}</h4>
If successful, ExampleUI should display the following
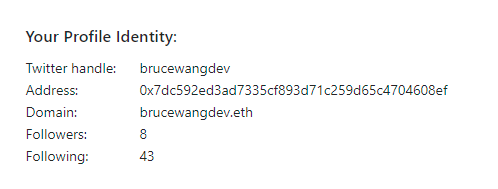
Search a Profile and Read Its Followers & Followings Lists
In this section, we enable users of your DApp to search for another user’s profile and read their followers & followings list. In this example, we use “cyberlab.eth” as a default profile. The Get Identity query is the same as the “Read a Profile” example.
Add the search functionality to ExampleUI at packages\react-app\src\views\ExampleUI.jsx by modifying the code as follows. In this example, we attempt to display the searched address’s Twitter handle, ENS domain, followers/followings counts, and followers/followings lists. Note that in this example, we display followers by their addresses and followings by their ENS domains.
packages\react-app\src\views\ExampleUI.jsximport { SyncOutlined } from "@ant-design/icons";
import { utils } from "ethers";
import { Button, Card, DatePicker, Divider, Input, Progress, Slider, Spin, Switch, Row, Col } from "antd";
import React, { useEffect, useState } from "react";
import { Address, Balance, Events } from "../components";
import CyberConnectFollowButton from "../components/CyberConnectFollowBtn";
import { getIdentity } from "../queries/cyberconnect";
export default function ExampleUI({
purpose,
address,
mainnetProvider,
localProvider,
yourLocalBalance,
price,
tx,
readContracts,
writeContracts,
injectedProvider,
}) {
const [newPurpose, setNewPurpose] = useState("loading...");
const demoAddr = "cyberlab.eth";
const [identityInput, setIdentityInput] = useState(demoAddr);
const [identity, setIdentity] = useState(null);
const [searchedIdentity, setSearchedIdentity] = useState(null);
const fetchIdentity = async () => {
if (!address) return;
const res = await getIdentity({ address: address });
if (res) {
setIdentity(res);
}
};
useEffect(() => {
fetchIdentity();
}, [address]);
const searchIdentityHandler = async () => {
if (!identityInput) return;
const res = await getIdentity({ address: identityInput });
if (res) {
setSearchedIdentity(res);
}
};
const formatAddress = address => {
const len = address.length;
return address.substr(0, 5) + "..." + address.substring(len - 4, len);
};
return (
<div>
{/*
⚙️ Here is an example UI that displays and sets the purpose in your smart contract:
*/}
<div style={{ border: "1px solid #cccccc", padding: 16, width: 500, margin: "auto", marginTop: 64 }}>
{/* CyberConnect Profile Section */}
<div>
<h2>CyberConnect Example UI:</h2>
<Divider />
<div style={{ textAlign: "left", marginLeft: "10px" }}>
<h3>Your Profile Identity:</h3>
{identity && (
<div>
<Row>
<Col span={6}>Twitter handle:</Col>
<Col span={18}>{identity.twitter?.handle ? identity.twitter.handle : "n/a"}</Col>
</Row>
<Row>
<Col span={6}>Address:</Col>
<Col span={18}>{identity.address}</Col>
</Row>
<Row>
<Col span={6}>Domain:</Col>
<Col span={18}>{identity.domain ? identity.domain : "n/a"}</Col>
</Row>
<Row>
<Col span={6}>Followers:</Col>
<Col span={18}>{identity.followerCount}</Col>
</Row>
<Row>
<Col span={6}>Following:</Col>
<Col span={18}>{identity.followingCount}</Col>
</Row>
</div>
)}
</div>
</div>
<Divider />
<div style={{ textAlign: "left", marginLeft: "10px" }}>
<h3>Search a Profile Identity:</h3>
<Input
placeholder="Enter the address/ens you want to search.."
onChange={e => setIdentityInput(e.target.value)}
value={identityInput}
/>
<Button style={{ margin: "8px 0px" }} onClick={searchIdentityHandler}>
Submit
</Button>
{searchedIdentity && (
<div>
<Row>
<Col span={6}>Twitter handle:</Col>
<Col span={18}>{searchedIdentity.twitter?.handle ? searchedIdentity.twitter.handle : "n/a"}</Col>
</Row>
<Row>
<Col span={6}>Address:</Col>
<Col span={18}>{searchedIdentity.address}</Col>
</Row>
<Row>
<Col span={6}>Domain:</Col>
<Col span={18}>{searchedIdentity.domain ? searchedIdentity.domain : "n/a"}</Col>
</Row>
<Row>
<Col span={6}>Followers:</Col>
<Col span={18}>{searchedIdentity.followerCount}</Col>
</Row>
<Row>
<Col span={6}>Following:</Col>
<Col span={18}>{searchedIdentity.followingCount}</Col>
</Row>
<Row span={18} justify={"center"}>
<div style={{ padding: "20px" }}>
<h4>Followers</h4>
{searchedIdentity &&
searchedIdentity.followers?.list.map(user => {
return (
<div key={user.address}>
<div>{user.domain || formatAddress(user.address)}</div>
</div>
);
})}
</div>
<div style={{ padding: "20px" }}>
<h4>Followings</h4>
{searchedIdentity &&
searchedIdentity.followings?.list.map(user => {
return (
<div key={user.address}>
<div>{user.domain || formatAddress(user.address)}</div>
</div>
);
})}
</div>
</Row>
</div>
)}
</div>
<Divider />
<h2>Scaffold-eth Example UI:</h2>
<h4>purpose: {purpose}</h4>
...
After you finish editing, you can search “cyberlab.eth” profile by clicking “Submit”. If successful, ExampleUI should display the following:

Play around with the search functionality by inputting different addresses or ENS domains. Feel free to check out several popular users here.