Create a Profile
In this section you will learn how to interact with a smart contract to create a profile. We sometimes refer to it as a profile NFT and the reason behind it is that, once the profile is created, a NFT will automatically be minted and transferred to the user's wallet.
tip
The app you're building in this example is using the Link3 Profile smart contract for the Goerli Testnet Network. If, you want to build on a different newtwork (e.g. BNB Testnet), please refer to the Cheat sheet to find the corresponding address and update both the contract and chain id variables in your project.
Connect wallet
The very first step in building any web3 application is to allow the user to connect to the app using its wallet, in this case the MetaMask wallet.
Whether the user wants to create a profile or subscribe and so on, you need to make sure that user first connects to the application and you can use a library like Ethers.js for that.
As best practice, it would be helpful to consider implementing a check function to verify if the user is connected to the correct network every time the user uses its wallet.
Once you've covered these two main functionalities involving the MetaMask wallet you can move on to bigger things like interacting with the smart contract.
Contract ABI
An ABI (Application Binary Interface) is a way to interact with a smart contract directly from the user's wallet. If you're unfamiliar with it take a couple of minutes to go over an ABI's specification.
The ABI is simply a JSON file that needs to be imported into your project, and, the best part is that you only need to add the functions that you actually use in your app.
In this example you will be working with Link3 Profile NFT's ABI for the contract 0x57e12b7a5f38a7f9c23ebd0400e6e53f2a45f271. Since you only need to create a profile and retrieve the profile id after the profile has been created, go ahead a mention in your .json file the createProfile and the getProfileIdByHandle functions.
[
    {
        "inputs": [
            {
                "components": [
                    {
                        "internalType": "address",
                        "name": "to",
                        "type": "address"
                    },
                    {
                        "internalType": "string",
                        "name": "handle",
                        "type": "string"
                    },
                    {
                        "internalType": "string",
                        "name": "avatar",
                        "type": "string"
                    },
                    {
                        "internalType": "string",
                        "name": "metadata",
                        "type": "string"
                    },
                    {
                        "internalType": "address",
                        "name": "operator",
                        "type": "address"
                    }
                ],
                "internalType": "struct DataTypes.CreateProfileParams",
                "name": "params",
                "type": "tuple"
            },
            { "internalType": "bytes", "name": "preData", "type": "bytes" },
            { "internalType": "bytes", "name": "postData", "type": "bytes" }
        ],
        "name": "createProfile",
        "outputs": [
            { "internalType": "uint256", "name": "tokenID", "type": "uint256" }
        ],
        "stateMutability": "payable",
        "type": "function"
    },
    {
        "inputs": [
            { "internalType": "string", "name": "handle", "type": "string" }
        ],
        "name": "getProfileIdByHandle",
        "outputs": [
            { "internalType": "uint256", "name": "", "type": "uint256" }
        ],
        "stateMutability": "view",
        "type": "function"
    }
]
info
Users can create as many profiles as they wish. There is also a setPrimaryProfile function in the Profile NFT's contract ABI that can be implemented by following the same logic as the one described for createProfile.
Let's take a closer look at the required params that the function is expecting:
CreateProfileParams;preData;postData.
First, there are the CreateProfileParams that contain all the necessary information about a profile.
The first 3 key-value pairs for this param are pretty self-explanatory:
tois the user's wallet address;handleis the user's handle;avataris a URL link for the user's avatar.
Then, there is metadata, and here is where the Profile NFT starts to shine because it allows you to get creative. It all depends on how your app will look and the information it will display.
tip
metadata doesn't follow a specific schema so it allows developers to customize the structure.
This is how the interface for metadata looks like for this application:
/* Metadata schema for Profile NFT */
interface IProfileMetadata {
    name: string;
    bio: string;
    handle: string;
    version: string;
}
Last but not least, there is operator which is telling the contract what address is allowed to make changes on behalf of the user's wallet address.
The next required params are preData and postData which are essentially middlewares that will dictate what the contract should process before and after a profile is created.
To keep things simple, you won't set any middleware in this example. More on this topic in the Middleware section.
Create a Profile
As mentioned previously, you will be working with the Link3 Profile NFT respectively the 0x57e12b7a5f38a7f9c23ebd0400e6e53f2a45f271 contract.
Everything will take place on the client side:
- Collect user input and construct the metadata schema;
- Upload metadata object to IPFS to get the hash;
- Instantiate the
contractobject and call thecreateProfileandgetProfileIdByHandlefunctions;
/* Collect user input */
const handle = prompt("Handle:") || randUserName();
const avatar = prompt("Avatar URL:") || randAvatar({ size: 200 });
const name = prompt("Name:") || randFullName();
const bio = prompt("Bio:") || randPhrase();

/* Construct metadata schema */
const metadata: IProfileMetadata = {
    name: name,
    bio: bio,
    handle: handle,
    version: "1.0.0",
};

/* Upload metadata to IPFS */
const ipfsHash = await pinJSONToIPFS(metadata);

/* Get the signer from the provider */
const signer = provider.getSigner();

/* Get the contract instance */
const contract = new ethers.Contract(
    PROFILE_NFT_CONTRACT,
    ProfileNFTABI,
    signer
);

/* Call the createProfile function to create the profile */
const tx = await contract.createProfile(
    /* CreateProfileParams */
    {
        to: address,
        handle: handle,
        avatar: avatar,
        metadata: ipfsHash,
        operator: PROFILE_NFT_OPERATOR,
    },
    /* preData */
    0x0,
    /* postData */
    0x0
);

/* Wait for the transaction to be mined */
await tx.wait();

/* Call the getProfileIdByHandle function to get the profile id */
const profileID = await contract.getProfileIdByHandle(handle);
If the profile was successfully created, you can verify the logged transaction hash on goerli.etherscan.io.
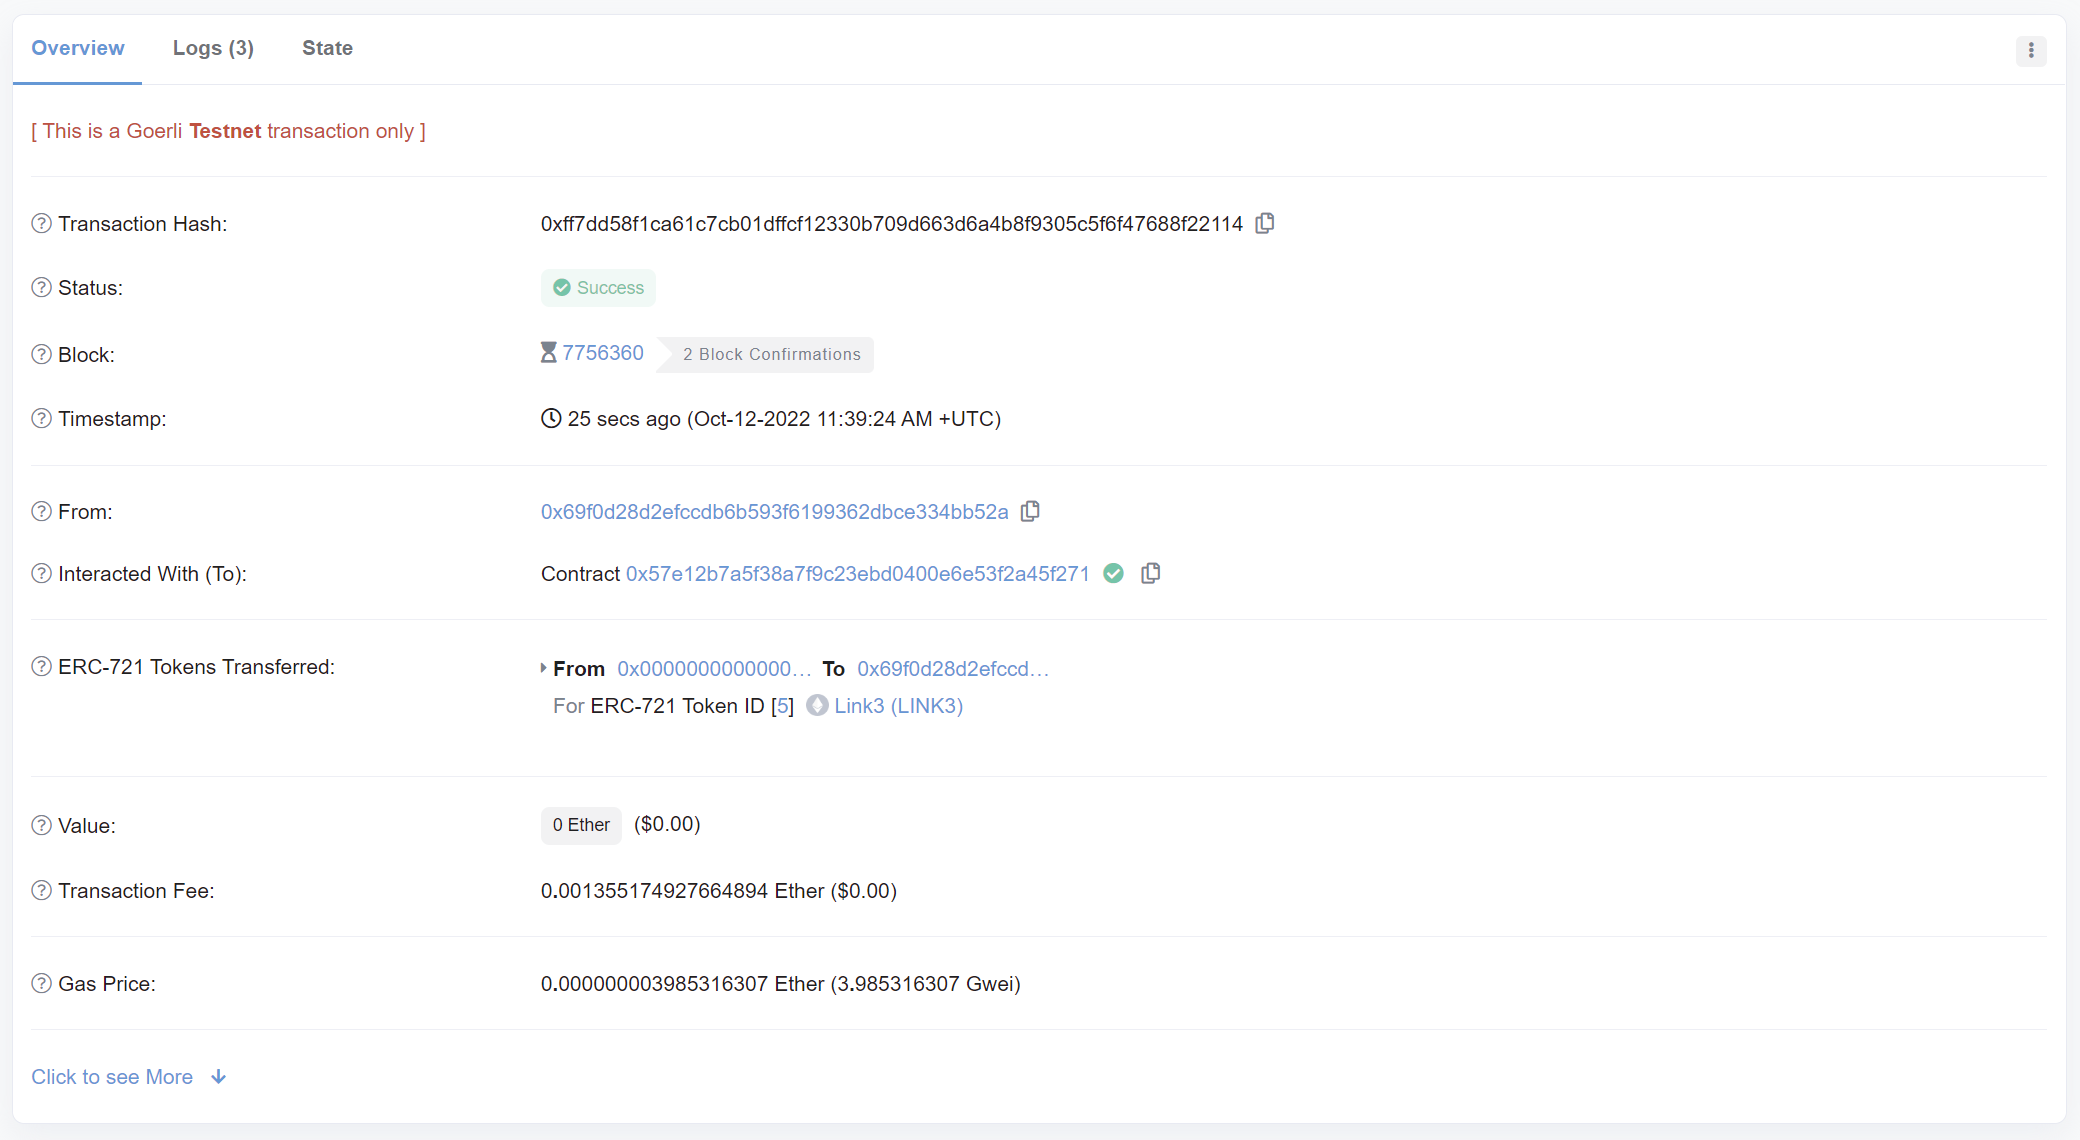
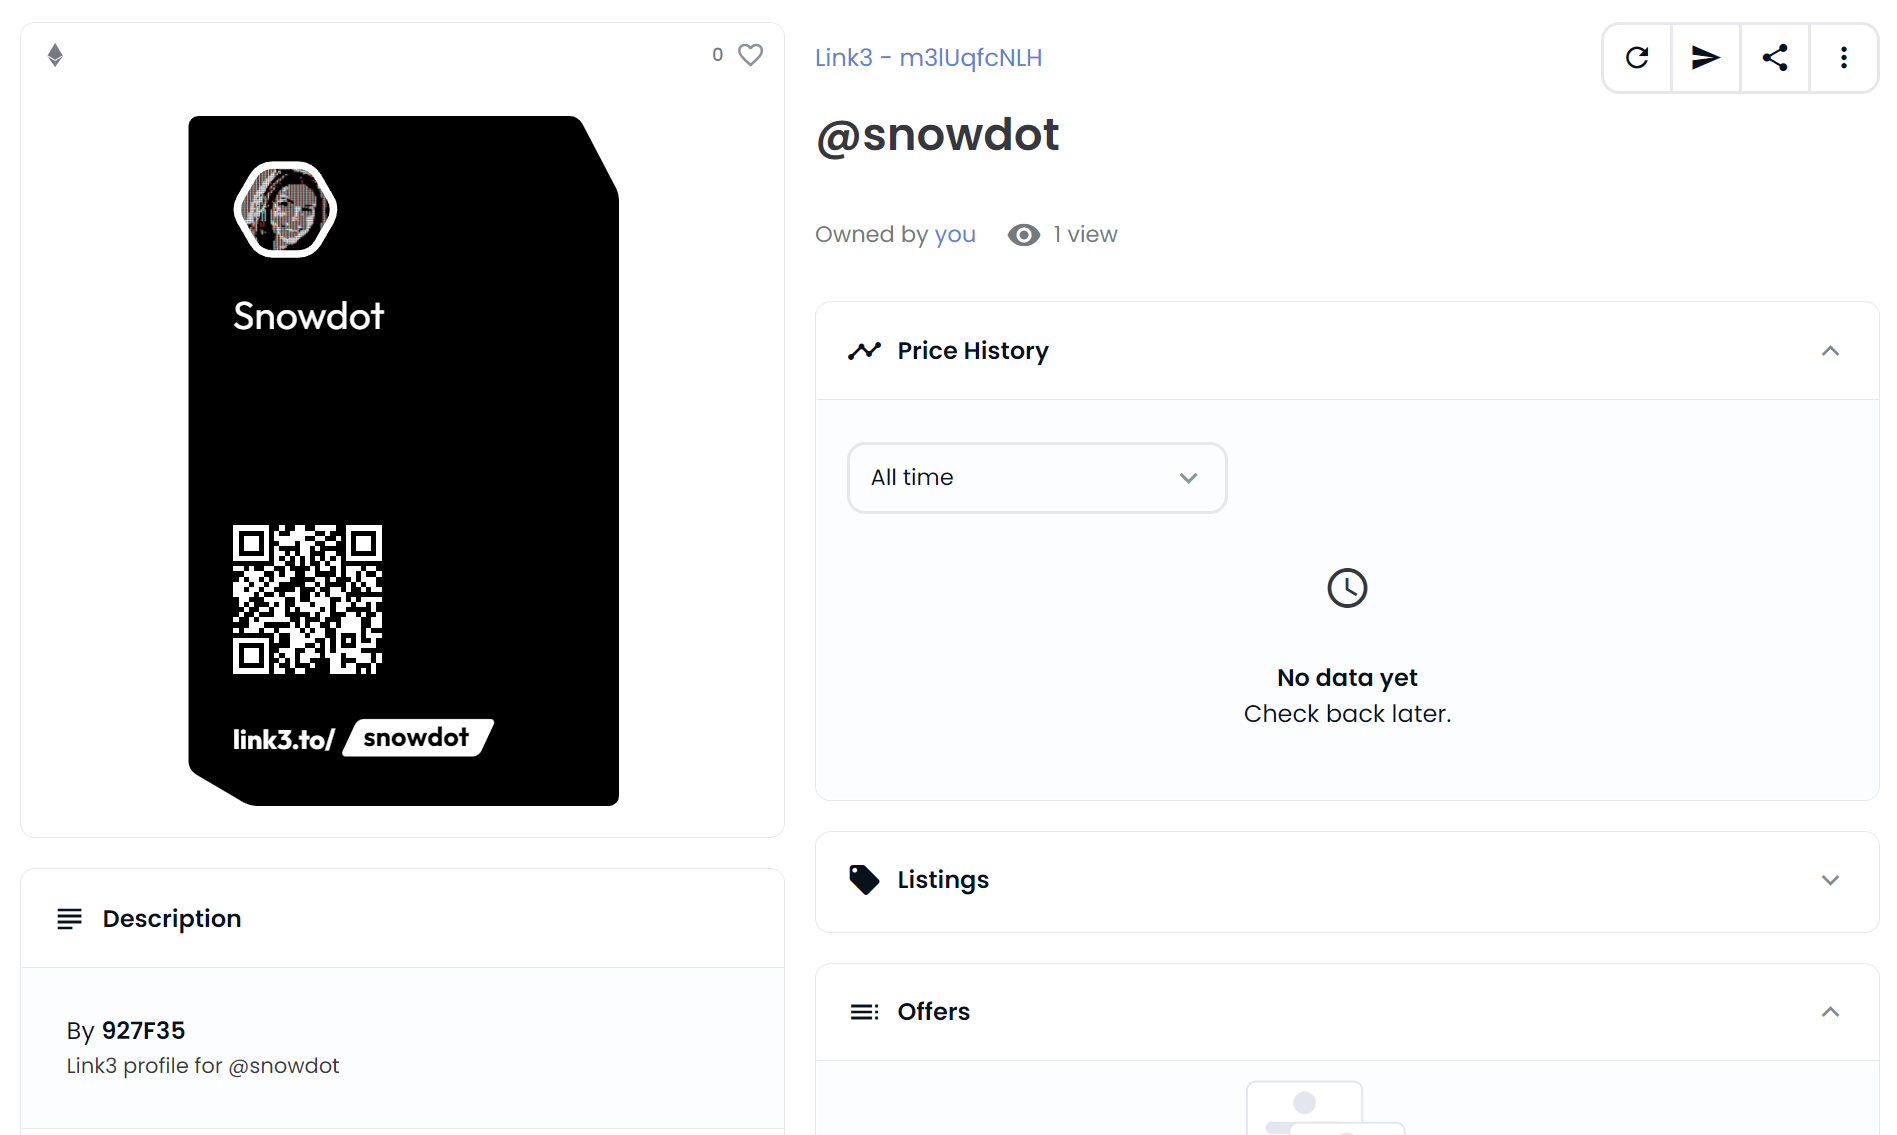
You can also view the NFT for the profile on testnets.opensea.io. The Link3 Profile NFT contract is generating these beautiful SVGs for the NFTs, mints the profile NFT and then transfers it into the owner's wallet address.
Great job! You've created your first profile! In the next section we will go over the Authentication process.